My "Go To" Box Hair Dye & At Home Colouring Routine
Monday, May 18, 2015For those times in-between salon visits, or covering up salon mistakes or covering up regrowth or even when I'm being too slack to measure and mix up proper colours, this is my go to box hair dye - L'Oreal's Casting Creme Gloss (semi-permanent & ammonia free) hair dye.
This time around I'm covering up my lighter summer mid brown tones (which were a cover up of a salon balayage disaster that I won't get into otherwise we'll be here all day lol) to my so-dark-brown-its-almost-black winter tone.
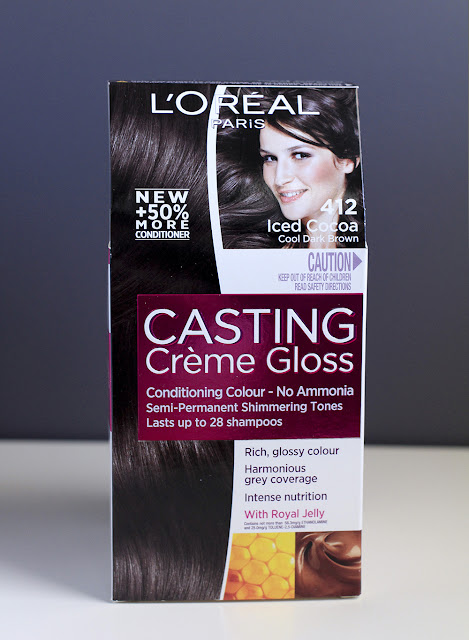
First up what's on the box. You can see here that this particular dye is a semi-permanent gloss, which when you're going darker or have dark hair and are only tinting your regrowth is all you really need.
I love using a semi-permanent because I get a glossier final result and my hair is less damaged in comparison to using a permanent dye. The L'Oreal Casting Creme Gloss dye has become my go to as it's just so reliable. You can get it almost anywhere they sell hair dyes eg Target, Woolworths/Coles, Priceline etc. I find one box is enough to cover my regrowth and the lighter sections of my lengths that I'm correcting. For my length hair, if I had to cover the entire lot then I'd need 2 boxes.
Also safety instructions. READ THEM! If you haven't used this brand or dye before then please, please do an allergy test as instructed in, on and around the box.
The colour I've chosen is 412 Iced Cocoa, which on my hair will go a nice super dark chocolate almost black colour that will fade to a dark brown.
 |
| front and back of the box |
 |
| the important info and items in the box |
 |
| all the allergy warnings - follow them!!! |
 |
| contents of the Casting Creme box |
Some extra tools that I always use/have at home for when I dye my hair are things like non-latex gloves, a mixing bowl and applicator brush, a wide tooth comb and some large alligator clips. You don't need any of these to use the dye (gloves come in the box and the mixing bottle has a nozzle to help application) however I find they make the whole process quicker, easier and less messy.
 |
| some handy additional tools |
To mix up the dye you can either follow the included instructions and squeeze the pink tube that contains the colourant into the nozzle bottle that has the creme developer inside and then shake it like a polaroid picture OR empty them into mixing bowl and stir like I do.
I find this way easier for mixing and applying as well as maximising how much product you can get out of the bottles.
 |
| developer cream + colourant = funny looking |
 |
| thoroughly mixed and good to go! |
Once you'e got your dye evenly mixed you can start applying! I try to dye my hair on the morning after I've washed it the night before or on an evening where I've washed it in the morning. Basically 12-16hr old hair as this seems to work best for me, but realistically it just needs to be on clean dry hair that hasn't been washed moments before hand.
Application wise, I start at my natural part and working in sections brush the dye on at the part covering the roots on both sides, then section and repeat, while pinning up my dye-loaded hair as I go until all my roots are done front and back. Then I let my hair down, briefly brush through with a wide tooth comb, then load up my palms with dye and smoosh it down the lengths, kind of scrunching as I go. I then continue brushing through and slathering of dye 'til I run out.
Once I've finished applying, I like to mould an incredibly sexy cone shaped helmet of hair on top of my head and then wrap it with Gladwrap (cling film) to stop me accidentally transferring it onto couch, wall, fridge, anything while it processes.
Be careful with the Gladwrap - you don't want it too tight as it'll trap too much heat ad may over process. It takes me about 15mins to apply and then I leave it for about 20-25mins before washing out.
Be careful with the Gladwrap - you don't want it too tight as it'll trap too much heat ad may over process. It takes me about 15mins to apply and then I leave it for about 20-25mins before washing out.
 |
| all applied and now to the waiting |
 |
| my hilarious Gladwrap hat |
For washing it out the box says to "rinse until water runs clear and then apply supplied conditioner and rinse again". Pfft, ah how 'bout no.
For me as I have dermal piercings in the back of my neck I actually have to wash my hair upside down - I find this technique also works great for washing hair dye out in the shower! Just flip your hair over and you won't end up with those faint dye streams down the side of your face, nose and shoulders lol. Or if you have a friend whose free they can always wash it out for you in the sink a la salon style.
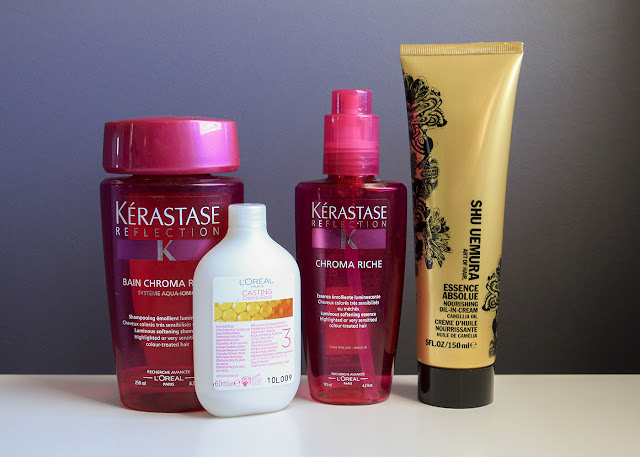
Besides hair washing technique, I like to rinse the dye out and then follow with a colour protecting shampoo like my fave Kerastate Chroma Riche, twice. I then use the little conditioner supplied as a hair mask, applying heaps and leaving for 5-10mins before rinsing.
It has a strong chemically fruity scent so you may want to swap it out for your own regular deep conditioning hair mask/conditioner if the scent is annoying. There's enough conditioner for about 4 washes of my long hair.
It has a strong chemically fruity scent so you may want to swap it out for your own regular deep conditioning hair mask/conditioner if the scent is annoying. There's enough conditioner for about 4 washes of my long hair.
Once towel dried I like to use my Kerastase Chroma Riche Fluid leave in conditioning serum and if I'm going to blow dry straight away I like to use a tiny bit of Shu Uemura's Essence Absolue which smells divine helps hydrate my hair.
 |
| other care product L-R: Kerastase Chroma shampoo, the included Casting Creme conditioner, Kerastase Chroma Riche leave in serum and Shu Uemura Conditioning Oil |
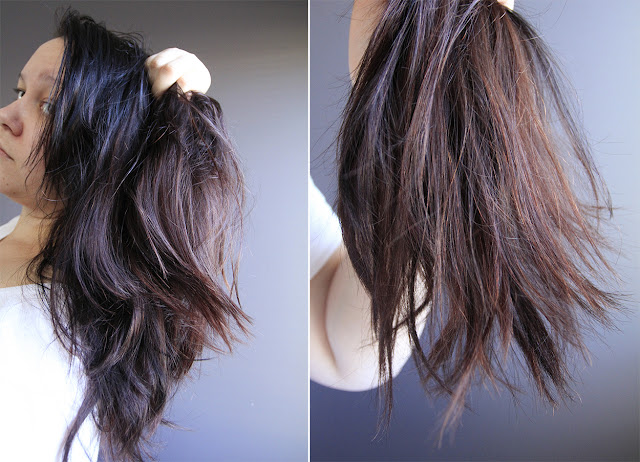
And that's it! The colour for me will last about 6-8 weeks before I'll notice a need to top it up. Below are some before & after shots in natural light.
 |
| my before shot - while my roots are fairly dark, the ends are this light orangey brown mess |
 |
| my after shot - you can see all the mid lengths and ends are a dark neutral brown |
 |
| another after shot - my roots are all shiny and lovely :) |
So do guys have a hair colouring routine? Do you dye at home or always go to the salon? And if it's a "go to" product would you say that would make it a Holy Grail product by default? Lols I struggled to find a better name than "go to" that wasn't Holy Grail. Let me know in the comments below!
Bambi xox


0 comments